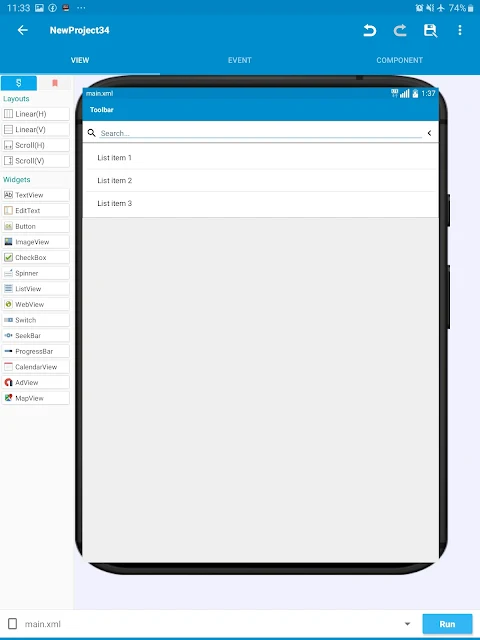
The user list will provide a list of all our users. Depending on the size of your network, your user list may range from a few people to millions. The user list is important because it shows a new or existing user who else is using the app and it allows them an opportunity to connect.
This tutorial will cover how to create a userlist for your app. The user list will look similar to the one shown in the image above.
As you get more experienced, we will optimise our app to perform better and cater for larger audiences.
Create the layout
Create a new Activity. Give this activity a new name... something like "users", "allusers" or "students". This will depend on the type of app.
Inside the linear Horizontal, place an imageview, a textview and an imageview inside the linear. Give the textview a weight of 1. This will make it take up the entire screen.
Change the imageviews and place the icons you want to use. In my example, I am using a search image and a back image.
Under the linear, place a listview. It should look similar to the one shown in the image above.
Add a customview
I have named my customview 'userlist'. You can give yours any name... just remember to follow the corresponding steps
Create the layout for how you want your list to be displayed.
I did this by adding a linear Horizontal.
Inside the linear Horizontal I placed an imageview.
I placed a linear vertical, next to the imageview (inside the linear Horizontal).
Inside the linear vertical I placed 3 textviews. I made the first one bold. This will hold the username.
My layout will look as shown below. Please note that I changed the text and the imageview in the properties.
Connect your customview to your listview
First click on the listview widget to reveal the properties menu. In the properties menu, select custom view as shown below
Select the specific customview that you want to display the user list.
Create a firebase db component
Navigate to the components section of your app as shown below
Click the red button similar to the one in the image below to create a new component
The components menu will be revealed. Click the 'firebase DB' component.
Name your firebase component.
Since we want to retrieve data that the user will have added in the profile section to the location users/userprofile, we will recreate the same component. You can name your component whatever you want... just remember to recreate the same component and file name in the different sections.
Navigate to the onChildAdded
Create a listmap as shown below.
In my example I've given my listmap the name userprof. You can give yours any name.
Add the following blocks Onchildadded to retrieve all the user data from your firebase DB directory users/userprofile. This logic will get the data from Firebase and display it in your listview
OnbindCustomview
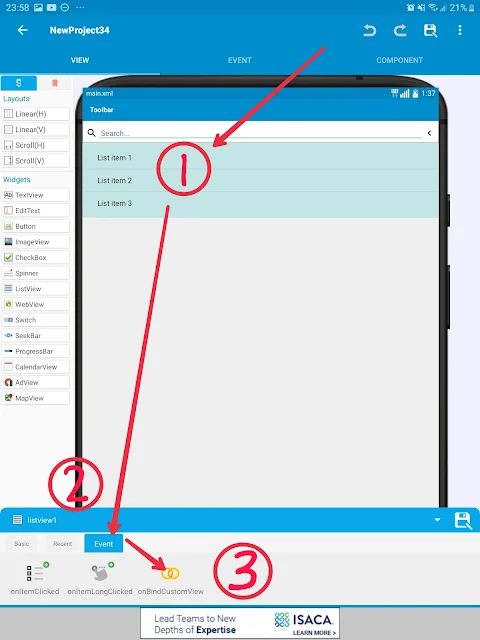
Navigate to the OnbindCustomview view event by following the steps shown below
Place the following blocks OnbindCustomview to determine which data will be displayed. I will show you two ways of displaying data. The first is simple and the second is slightly more complex.
Method 1
This method will display data and will work if you assign data to each user when they create an account.
This method might cause our app to crash if the user has not completed their profile. A lot of users will create profiles and leave them incomplete. Thus to avoid them we will use the following method.
Method 2 (Recommended)
This method uses some block to check if the listmap contains a key with a particular value at a specific position of the list. If that key is empty, we then assign a value to it. So the logic for a single block will be as follows:


Comments